Integrations
Content
Introduction
To deliver a comprehensive analysis of your system architecture, KPI needs to establish connection to the key systems including:
Azure DevOps: Source code control
Dataverse (Power Platform): All Dynamics 365 CE components
Azure: Components like Azure Functions, Azure Service Bus, or Azure Logic App
When establishing the connections, the Azure DevOps connection must be set up first.
The licensing is determined by the amount of scans conducted by the system, with each scan contributing to the overall licensing utilization.
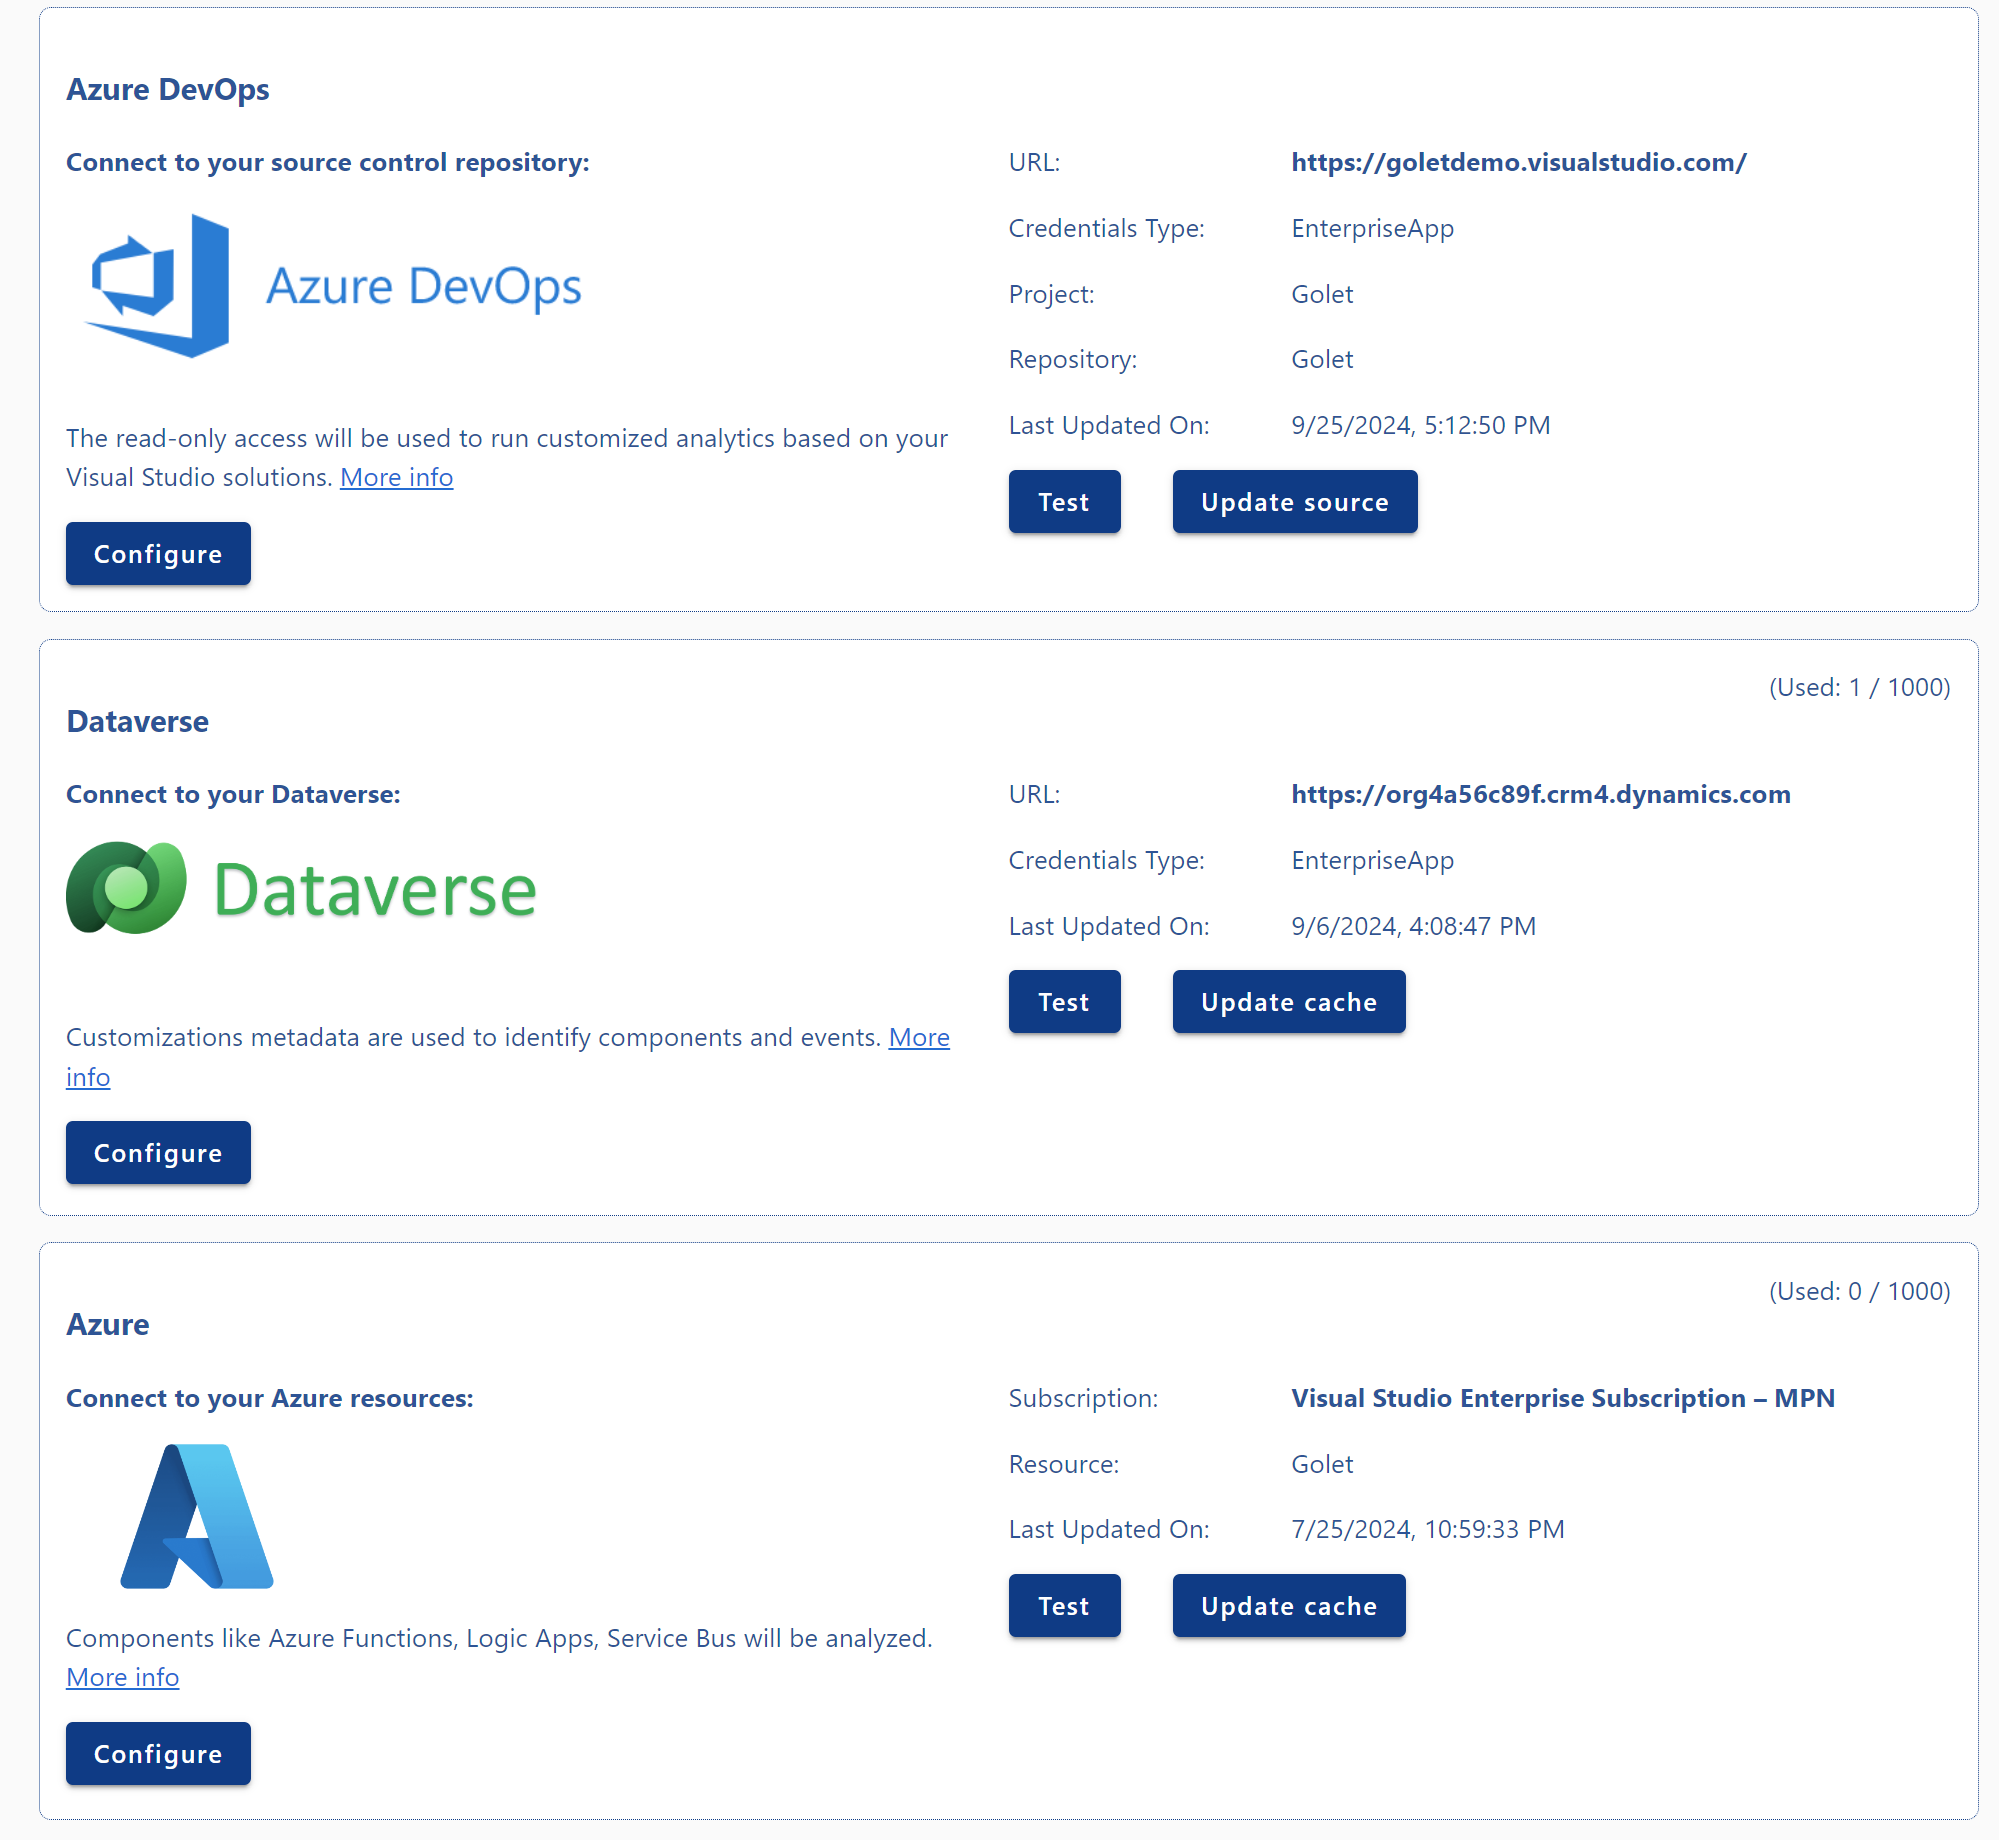
When a user scans Azure or Dataverse components and updates the cache, the application records the number of scans performed. These numbers are displayed alongside each panel on the 'Manage' page" (See screenshots below)
Once the limit is reached, updating Dataverse or Azure components for the current month is no longer possible.
To learn more about the different types of licenses and how they work, see here: Licensing
Azure DevOps
KPI only supports GIT repositories
From the 'Manage' in the left-hand menu bar, users can adjust the settings for establishing connections with Azure DevOps.
URL: The link used to establish a READ-ONLY connection to Azure DevOps
Credential Type: Username/Password, Enterprise Registration or PAT
Project: The selected project
Repository: The selected repository
Last Updated On: The date and time when the source was last refreshed.
Configuration and Authorization with Enterprise App
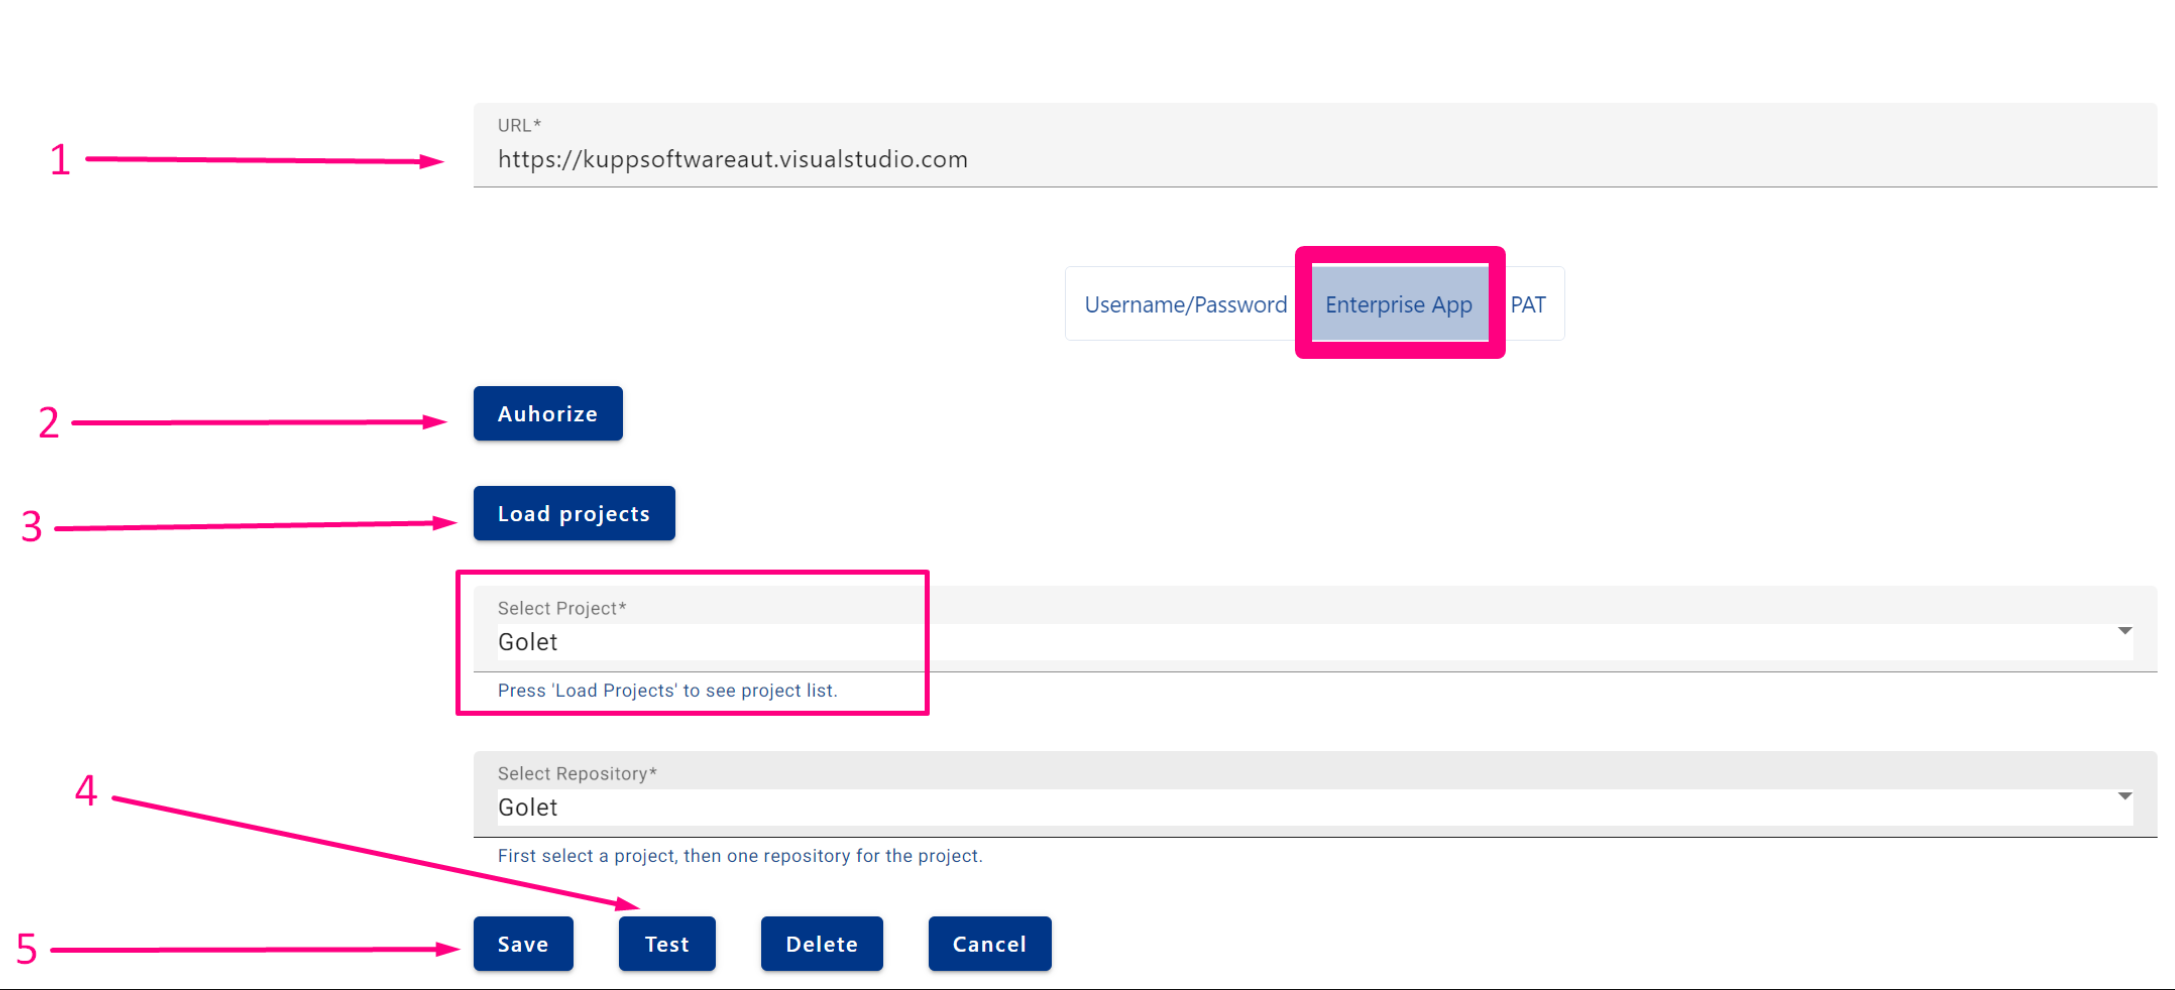
Step 1: Enter the URL to your Azure DevOps environment
Step 2: Click ‘Authorize’ to get excess to the Azure DevOps environment
Step 3: Click ‘Load Projects’ to integrate it into the selected environment
Step 4: Test the connection to check if everything works
Step 5: Save the established connection cache
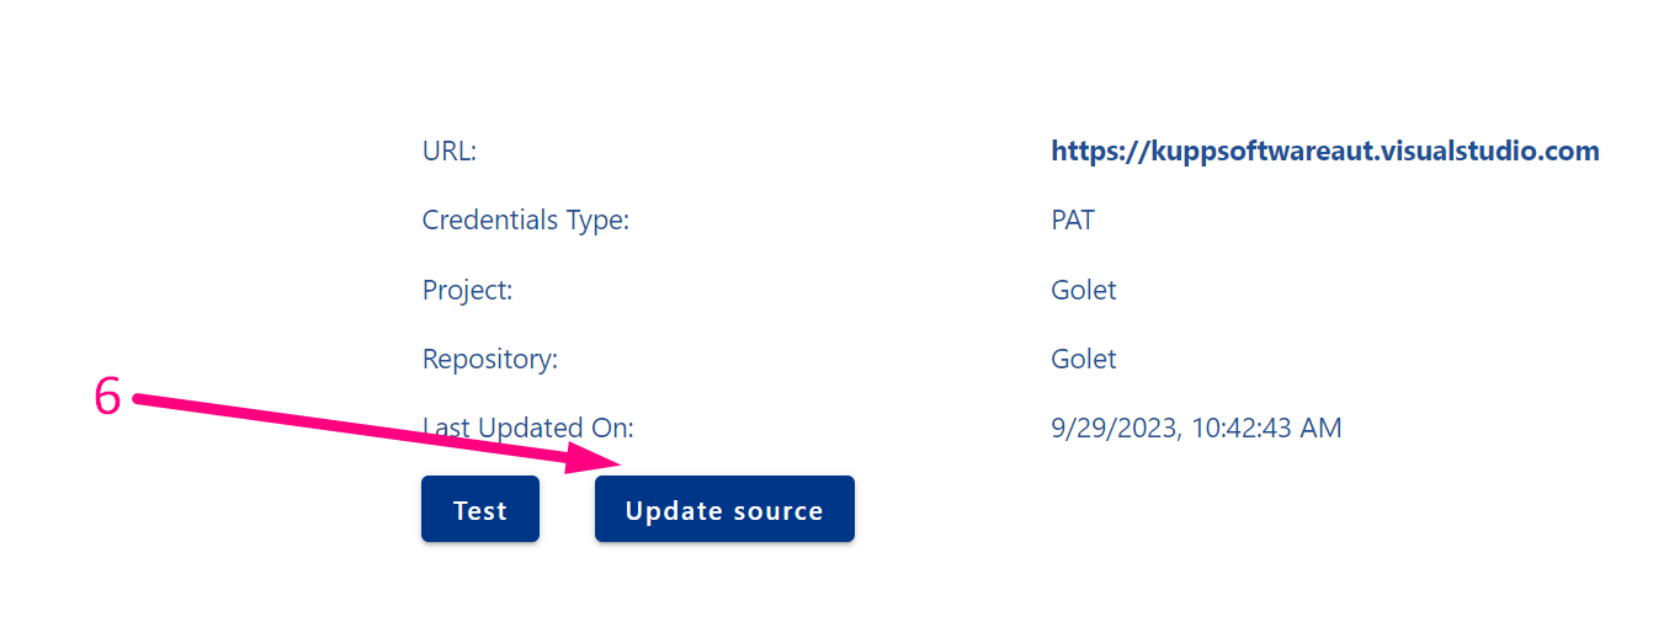
Step 6: Click on ‘Update Sources’ to update the code into the cache
Configuration and Authorization with PAT
What is a Personal Access Token? See: https://learn.microsoft.com/en-us/azure/devops/organizations/accounts/use-personal-access-tokens-to-authenticate?view=azure-devops&tabs=Windows
To use a “Personal Access Token” to grant access to the Azure DevOps Environment, follow these steps: Integrations | Configuration and Authorization with Enterprise App (excluding Step 2 )
Update source
This checks the repository of Azure DevOps Project and transfers all existing code into the cache.
See more: Integrations | Automated scheduled Cache and Source Updates
Dataverse
Provide the URL to your D365 Organization.
Configuration and Authorization with Username and Password
Grant access to your Dataverse Environment with your username and password.
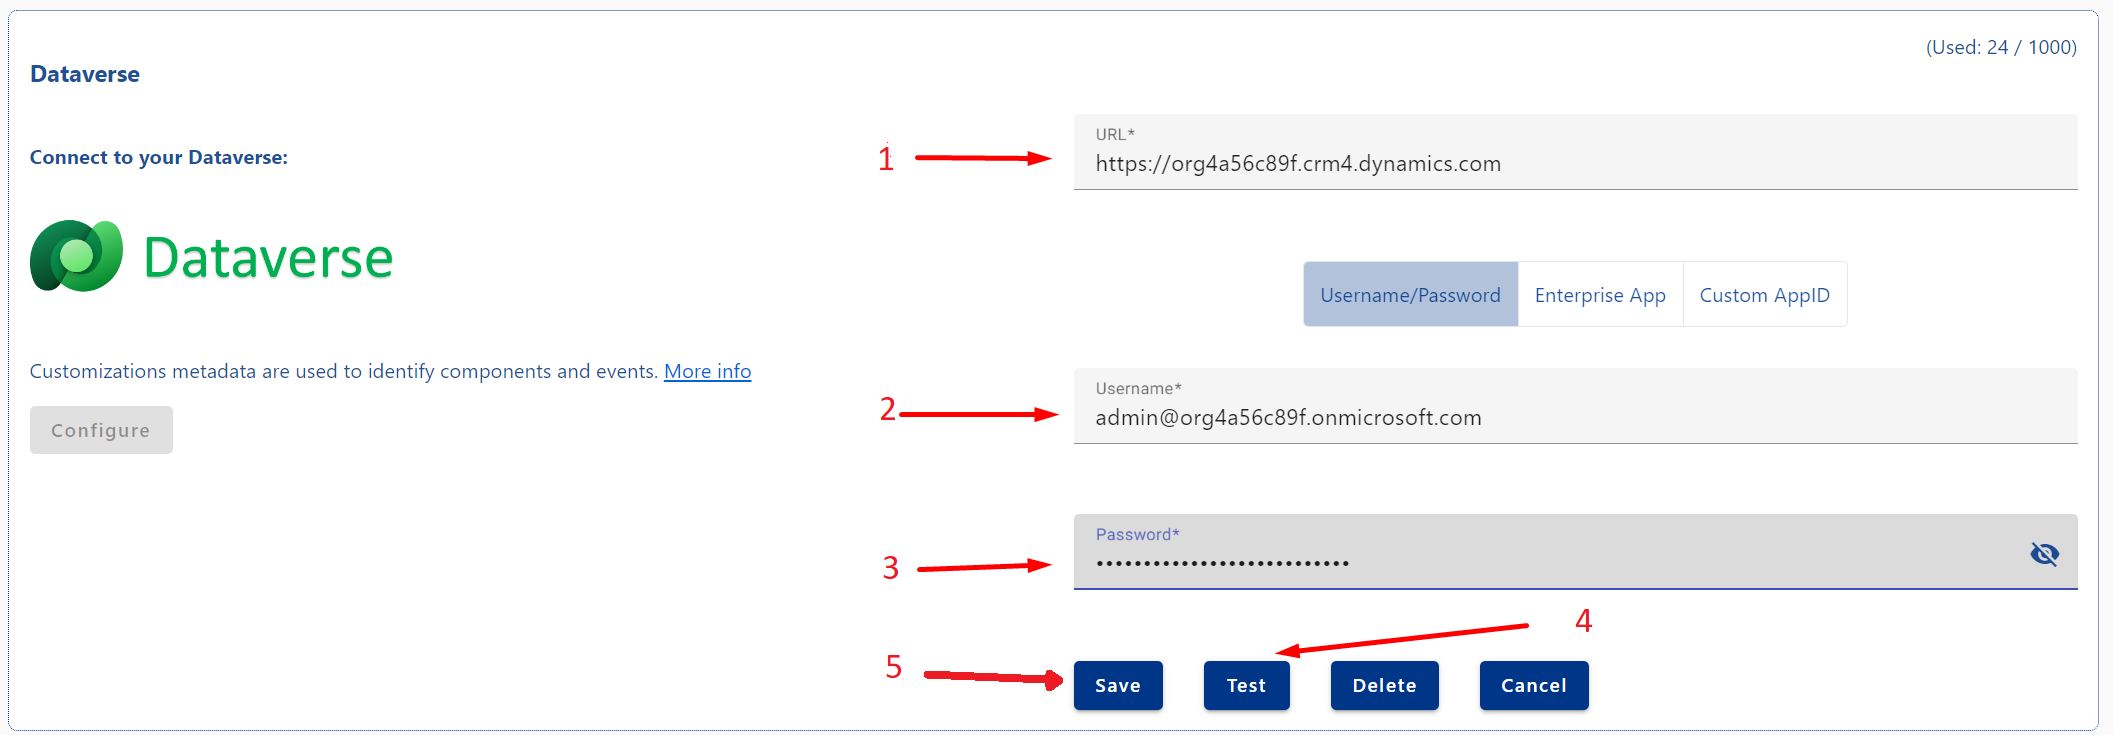
Step 1: Enter the URL to your Dataverse environment.
Step 2: Enter the username.
Step 3: Enter the password.
Step 4: Test the connection.
Step 5: If successful, save the connection.
Step 6: Scan Dataverse components and update the cache by simply clicking on the ‘Scan’ button.
Configuration and Authorization with Enterprise App (Preferred way)
Uses the Enterprise App to grant access through an Application User to your Dataverse Environment.
Step 1: Enter the URL to the Dataverse environment
Step 2: Click ‘Authorize’ to get excess to the Dataverse environment
Step 3: Test the connection to check if everything works
Step 4: Save the established connection cache
Step 5: Click on ‘Scan’ to analyze the Dataverse components and update it to the cache.
Configuration and Authorization with Custom App ID
Uses a Client ID and Secret to grant access to your Dataverse Environment.
Step 1: Enter the URL to your Dataverse environment .
Step 2: Enter the ClientID.
Step 3: Enter the password.
Step 4: Test the connection.
Step 5: If successful, save the connection.
Step 6: Scan Dataverse components and update the cache.
Update Cache
The cache update analyzes and loads all Dataverse components from both your code and Dataverse environment into the cache, enabling various features from Best Practices Analytics to Architecture Visualization.
See more: Integrations | Automated scheduled Cache and Source Updates
Azure
Use the created Enterprise App in your Azure tenant to grant access to your subscriptions and resource groups.
Configuration and Authorization with Subscription and ResourceGroupe
Step 1: Select Subscription : https://visualstudio.microsoft.com/subscriptions/
Step 2: Select ResourceGroup, this ResourceGroup will be analyzed:
Step 3: Test the connection.
Step 4: Save the changes that were made to the Subscription and Resource Group.
Step 5: Start the ‘Scan’ to save the components to the cache and analyze it.
Update Cache
The cache update analyzes and loads all Azure components from both your code and Dataverse environment into the cache, enabling various features from Best Practices Analytics to Architecture Visualization.
See more: Integrations | Automated scheduled Cache and Source Updates
Dynatrace
The dynatrace open telemetry endpoint will automatically be enabled after configuration.
More information: https://docs.dynatrace.com/docs/extend-dynatrace/opentelemetry
Enterprise Application
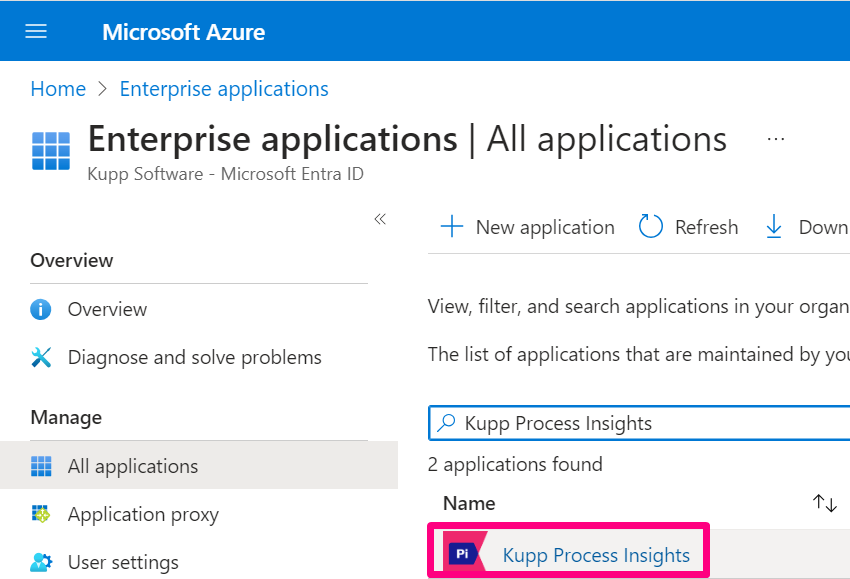
Upon the initial login to KPI, there will be an Enterprise App registered in your Azure Tenant called Kupp Process Insights.
More information about Enterprise applications: https://learn.microsoft.com/en-us/azure/active-directory/manage-apps/
Automated scheduled Cache and Source Updates
To ensure the KPI environment updated with the latest code and components, there's a feature to schedule automated cache/source updates.
More information here: System Jobs | Schedule Cache Update Jobs
